Contents
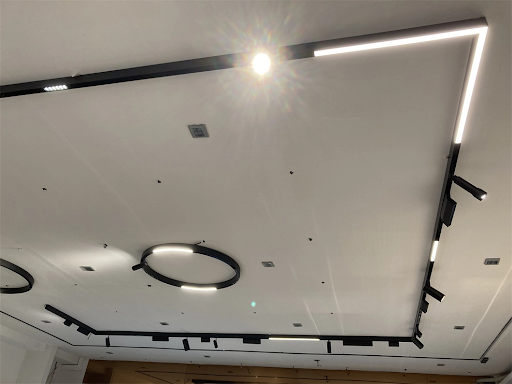
Magnetic LED light strips offer a versatile and convenient lighting solution for both residential and commercial spaces. With their easy installation and flexible design, these strips can be used to add ambient lighting, highlight architectural features, or provide task lighting in various environments. In this step-by-step guide, we will walk you through the process of installing magnetic LED strips, along with tips for maximizing their effectiveness in your home or office.
1. Gather Your Materials
Before you begin, make sure you have all the necessary materials and tools on hand:
- Magnetic LED light strip kit
- Power adapter
- Scissors or wire cutters
- Cleaning supplies (isopropyl alcohol and a lint-free cloth)
- Optional: LED strip connectors, extension cables, and dimmer switches
2. Prepare the Installation Surface
Ensure that the surface where you plan to install the magnetic LED light strips is clean and free of dust or debris. Use isopropyl alcohol and a lint-free cloth to wipe down the area thoroughly and allow it to dry completely before proceeding.
3. Plan Your Layout
Determine the desired placement and layout of the LED light strips. Consider factors such as the location of power outlets, the length of the LED strips, and any obstacles or architectural features that may affect the installation. It’s also helpful to sketch out a rough diagram or plan to guide your installation process.
4. Cut and Customize the LED Strips
If necessary, use scissors or wire cutters to trim the magnetic LED light strips to the desired length. Most LED light strips come with marked cutting points at regular intervals, allowing you to customize the length to fit your space accurately. Be sure to cut along the designated cutting points to avoid damaging the LEDs.
5. Peel and Stick the LED Strips
Remove the adhesive backing from the LED light strips to expose the sticky surface. Carefully adhere the strips to the installation surface, following your predetermined layout. Press firmly along the entire length of the strip to ensure a secure bond with the surface. For curved or irregular surfaces, you may need to bend or flex the LED strips slightly to achieve optimal adhesion.
6. Connect and Power the LED Strips
Once the LED light strips are in place, connect them to the power adapter according to the manufacturer’s instructions. Some kits may include connectors or extension cables to help bridge gaps between sections of the LED strips or reach distant power outlets. Ensure that the power adapter is plugged into a compatible power source and switch it on to activate the LED strips.
7. Optional: Install Juniper Lighting Fixtures
For additional versatility and functionality, consider complementing your magnetic LED light strips with Juniper lighting fixtures. Juniper offers a range of stylish and innovative lighting solutions, including pendant lights, wall sconces, and track lighting systems, that can enhance the ambiance and functionality of any space. Install Juniper lighting fixtures strategically to complement and augment the illumination provided by the LED light strips, creating a cohesive and visually appealing lighting scheme.
Conclusion
Installing magnetic LED strips is a straightforward and rewarding DIY project that can transform the ambiance of your home or office. By following this step-by-step guide and carefully planning your installation, you can create a customized lighting solution that suits your needs and preferences. Whether you’re adding accent lighting to a living room, illuminating a workspace, or enhancing the aesthetics of a commercial environment, magnetic LED light strips offer endless possibilities for creative expression and functional lighting design.